Creating and Editing Form Templates
Form Templates are pre-configured digital documents that are associated with an:
- Incident: Form templates enable responders to report relevant information from the field to the dispatcher and vice versa. You can attach one or more form templates to each incident type. These forms appear in the Dispatcher and in the mobile application when an incident is launched.
- Asset: Form templates provide the Dispatcher and the mobile application additional information about an asset. Each asset can have only one form attached to it. The asset form is accessible and can be edited by any user with the correct permissions (Dispatcher or mobile application user).
-
User Update: Form templates enable users to share updates relevant to their status or resource requirement. You can attach one ore more form template as an in-incident user update or as part of a policy to determine transition of a user from one policy to another.
After you complete the creation of the basic form template, continue with the specific procedure to customize the form template for incidents or assets.
Creating Form Templates
To create a new form in the system, you must have the correct permissions to access the system's settings.
To create a new form template
- Click Settings (gear) in the upper left corner of the Dispatcher screen.
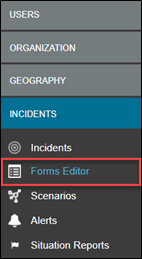
- Click the Incidents tab, and then select Forms Editor.
- In the Forms Table, you can:

- Create an entirely new form from scratch, by clicking on the + or,
-
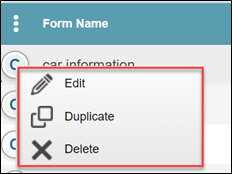
Duplicate an existing form and edit its contents by selecting the form, right-clicking, then selecting the Duplicate option.
Creating a New Form Template
You can create a new template from scratch.
To create a new form
-
In the Forms table, select +. The New Form window opens.
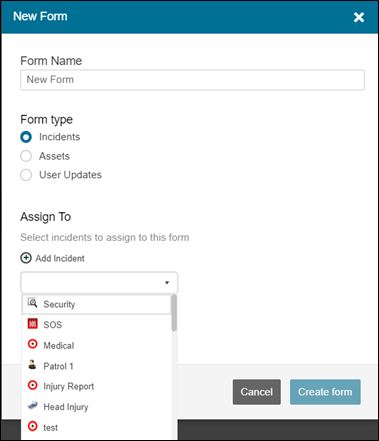
- Add a name in the Form Name field.
- Assign it a Form type.
- If you selected Form Type Incidents, then in the Assign to dropdown appears and you can select all of the Incident Types that this form will be assigned to.
- Click Create form.
Form Fields
After creating a new template, you must populate it with the required fields. The following fields are available to build your form template.
- Text Box: Free text area limited to a defined length.
- Text Area: Free text area in which you can enter a description of the incident/assets (limited in size according to your defined settings)
- Section Title: Form/section header
- Radio Buttons (+Panel): Create a list of options, from which the user can select one or more options.
- Checkbox: Enables the user to an option.
- Image Upload: Enables the user to capture and send an image.
- Date Time Picker: Enables the user to enter a date and time.
- Location Pin: The latitude and longitude of the user/incident.
- Time Stamp: The time the form was completed.
- Signature: Enables the user to insert a signature into the form.
- External Video: Enables the user to capture and send a video.
- Panel: The panel to which the radio buttons are added.
- Dropdown Select: Enables the user to choose from a dropdown list.
- Barcode Scan: Enables the user to scan a QR code and compare that scanned code against a predefined list.
In the context of the above definitions, the user refers to the person completing the form template.
To populate a form template
-
Drag and drop the required fields from the left panel into the form workspace.
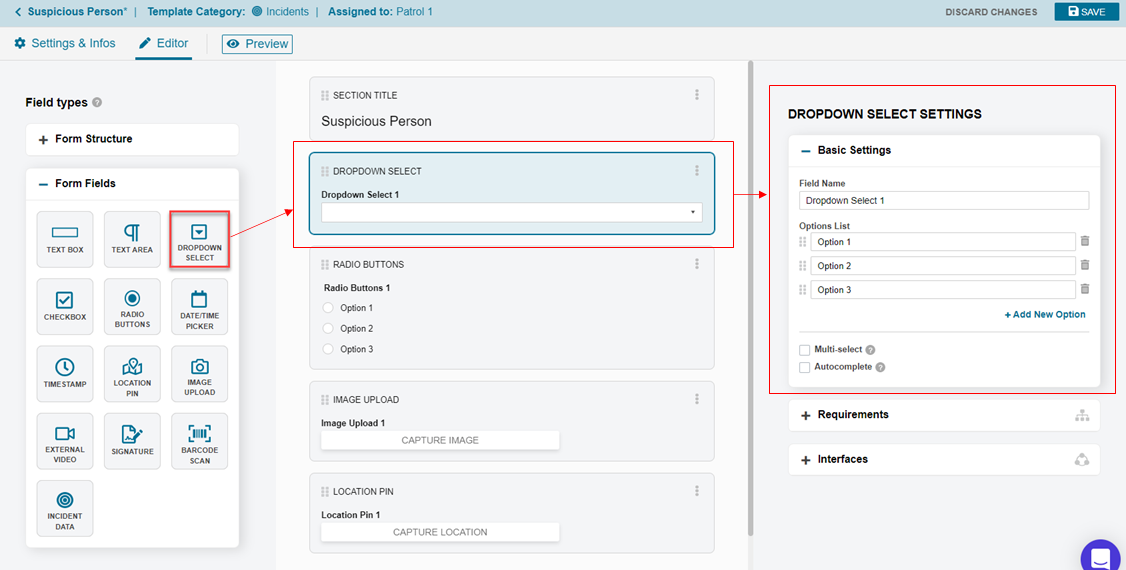
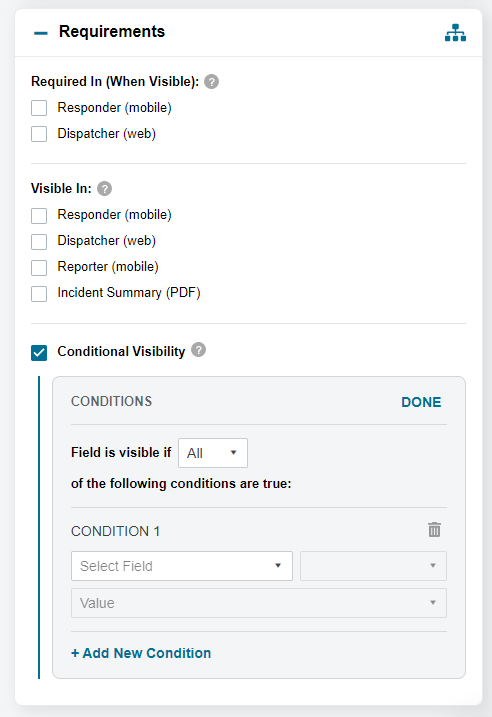
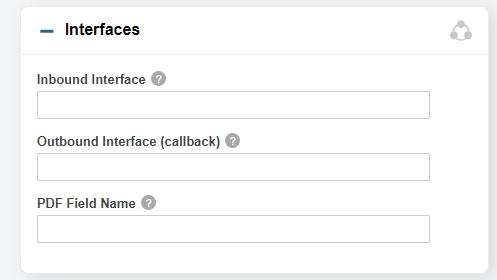
- To edit a field, click on the field to open the list of Settings that relate to that form. These include Basic Settings, Requirements and Interfaces.
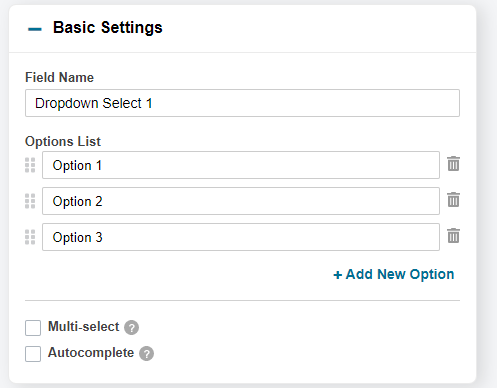 |
The Basic Settings lets you configure the field with a name, number of selectable options. Where available, multi-select and autocomplete can be added to the field.
|
|
Requirements settings allow you to set the field visible to different types of users in Dispatcher and Mobile, as well as set the terms of Conditional Visibility for the field. |
|
Interfaces configurations allow you to specify field names for the API integrations your organization may have, as well as set the PDF field name for the form. |
- Repeat the process until you have all the fields inside of your form.
- Click Save.
